| By Helen Starkweather (*note edited Feb 2007)
This is the way I make HP soap. I developed this method through painstaking trial and error, and hundreds of ruined batches. There were no illustrated guides on the internet for soapmaking at all when I put it up in the very beginning of 2003, and I thought a photographic step-by step would be helpful to everyone looking to start soapmaking the simplest way. It was just too complex to explain in words over and over again on internet forums, so I thought I would simply show everyone.
Thank you all for the emails over the years about this page, and how it has influenced you. That's why it's still here. I think it's a simpler process than many that
I had previously seen on the net, and also, the included photos make identifying the stages
of cook a bit easier for someone new to the process.
I hope this guide will also help the next generation of soapmakers also.
**Note: My DBHP method is not as useful with castille
type or mostly olive oil soaps. Olive, as well as
a high polyunstaturated oil formula takes a far longer
time to cook than other oils, and tends to volcano
more often.
Before you Begin, you should
have:
A good scale that measures to the .1 at least. Ideally
to .01
I use a postal scale for best accuracy.
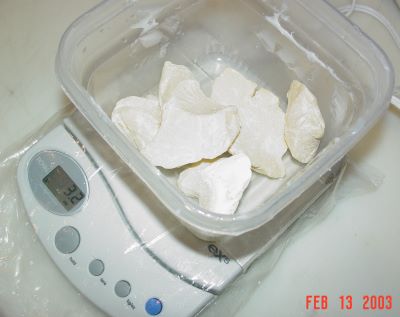
(quick tip: cover your scale with plastic or it's going to get ruined
very fast) |
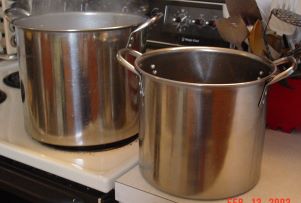
2 deep pots where 1 will 'fit' inside the other
(available at Walmart as a 3 pot stockpot set for $17.95)
|
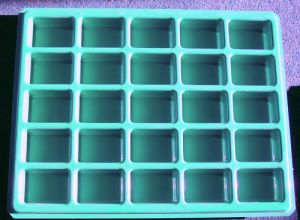
A good Mold for your soap. I use this one**:
(quick tip: spray with PAM or any light nonstick spray for easy release
of your soap later) **see note at end about mold.
|
Plastic, glass or Stainless Steel spoons and containers. Never use
Aluminum.
A 'stick' blender (available at any Walmart or Target).
Your recipe completely printed/written out, with your SAP values calculated.
**NOTE: Hot Processed does not work as well with Olive oil formulas, and I would not recommend starting with one because trace takes MUCH longer to accomplish. Until you are familiar with the process, stick with animal fat or coconut/palm oil recipes.
|
Begin: |
|
First, put the big pot 1/2 full of water on high til it's boiling,
then turn down to 1/2 so it's only gently boiling
and forget it for now.
Step 1: Weigh all your oils,
pour into the smaller Pot:
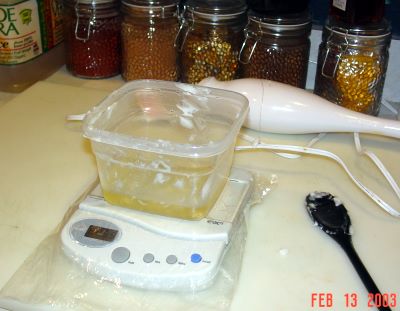
(my measuring bowl's dirty from the lard and coconut oil I already measured:P) |
Step 2: Set the pot on warm while measuring other
oils so the hard oils melt:
|
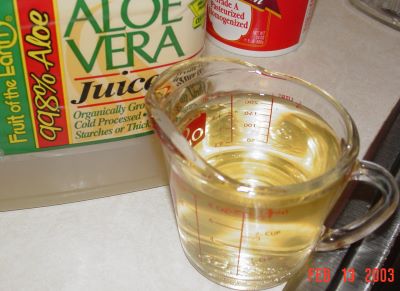
Step 3: While oils are melting, measure out your water
(I use 1/2 aloe juice in all my soap).
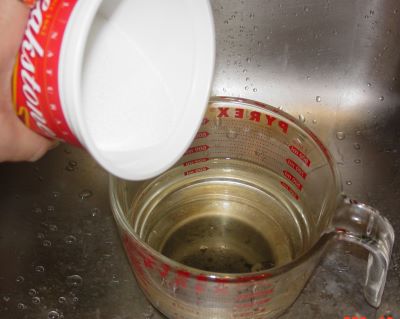
Step 4: Measure out your lye
(sodium hydroxide) after you are ready with
your water. I used a sour cream container that
I can throw away afterwards for the lye. Use
plastic for measuring the lye, not metal, and
pour into heatproof glass ideally. (I use a
pyrex cup)
Please be CAREFUL while using lye, and have a bottle of vinegar handy
in case of a spill. If you get it on yourself, it may not be obvious til
much later because of the nature of the burn, you can suffer excruciating
pain from it an hour later after it's eaten through your skin (ask me
how I know). Have a bottle of vinegar ready and pour it ANYWHERE lye has
spilled, even 1 grain worth.
|
**This is IMPORTANT. Lye is dangerous. It can kill you. It can certainly
blind you, and cause permanent scarring where you spill it on yourself.
Please wear safety goggles and gloves and take the proper precautions
while using it.
It is no joke, people have died by accidentally ingesting
lye. It is a prime ingredient in DRAIN cleaner. If it can unclog a drain by dissolving everything
soft in its path, you don't want to think about what it will do to your
mouth, throat, stomach if it makes it that far.
Also, you can see that I do all my mixing in the sink.
NEVER EVER add water TO the lye (it can spray out), ALWAYS add lye to the water as shown)
|
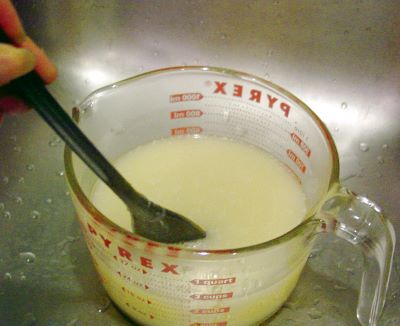
Step 5: Stir the Lye and liquid mixture til very smooth
and there are no grains. BE CAREFUL while stirring.
1 drop can eat through your skin or clothes
exactly the same as strong acid, but lye is slower acting, so if you see a drop and don't feel it, RINSE WITH WATER ANYWAY.
Not sure if you can see the smoke rising from the lye water during mixing.
Once added the temperatures are HOT.
|
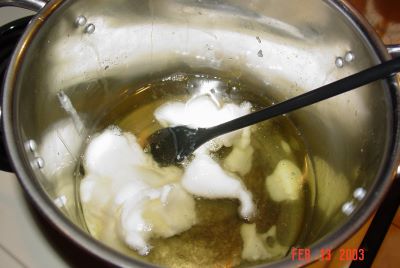
Step 6: Turn OFF the heat on the pot of oils, which
should have melted already. Now carefully add
the lye water to the oils in that pot. NO heat
at all under this pot, let it cool as you do
this.
Temperature does not matter in HP, but the oils should not be burning
hot. It should be just enough heat to melt the oils, then turned off.
|
Step 7: Stir the mixture of oils and lye so they are
well mixed by spoon.
|
Step 8: Break out the stick blender now.
Stir as you blend with the stick blender. What you are looking for is
Trace. With this particular 64 oz batch, trace takes about 2 - 5 minutes.
It depends on your formula, the kinds of oils you used, how long it takes.
Just keep your pot OFF the heat while you are blending to trace, high
temps will actually make trace take longer to occur.
|
Step 9: This is medium trace. See how the soap is
no longer liquid but kind of thick? The consistency
is of a pudding, and it's just making little
waves that stay for a few secs.
The word 'trace' means that you can take some soap on your spoon, and
dribble it on the mess and it will 'trace' on top of the soap before sinking
back in. Not a liquid, but not very thick either.
|
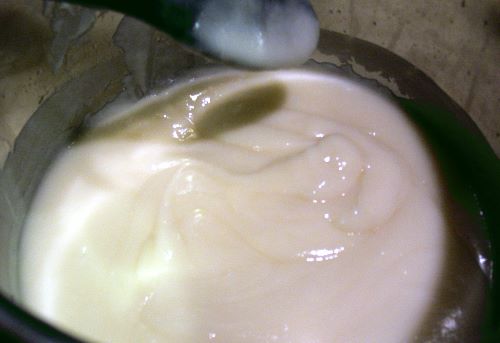
Step 10: Keep blending til you have a THICK trace,
like this:
Your soap is smooth and white and looks good enough to eat (don't eat
it!)
|
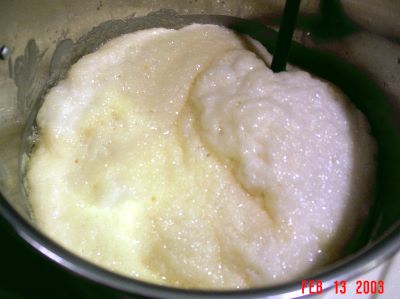
Now... if you did the above relatively quickly.... without even putting
it back on the heat, in about 5 minutes or so... THIS can happen all by itself.
Saponification. If it does (depends on your oil mix) STIR STIR STIR, and turn down the heat. Stirring introduces air, and helps to cool it down.
|
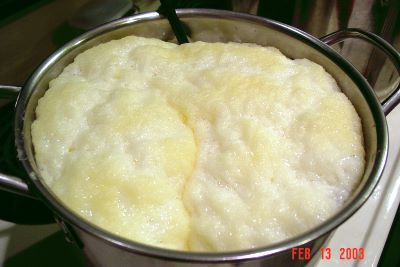
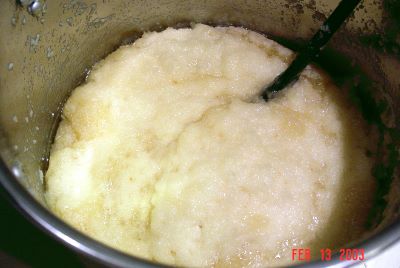
It gets even better, see? The stuff looks like the meringue on a lemon
meringue pie... and it smells good too! Remember!!! KEEP STIRRING!!!
Note: NOT all recipes will do the volcano. 100% vegetable oil soaps sometimes
never volcano (the recipe you see here is a lard based). If your oils
were very cool, it may not happen til you put in the big pot, so watch
carefully if it hasn't occurred before the cook.

|
Here is the reason why you get a BIG pot and use no more soap in your
recipe than will fill 1/2 the pot... it wants OUT of the pot, RIGHT NOW!
|
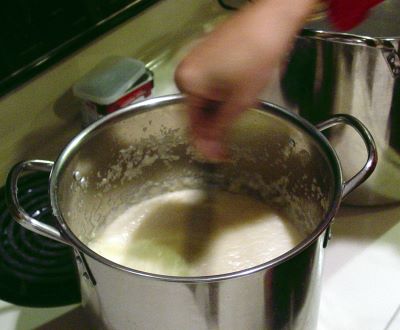
Step 11: STIR it down before you have soap on your
stove, your burners, your pot, your self. It
goes down very fast when stirred. I'm stirring
fast, can you tell?
If you don't stir, it WILL crawl right out of your pot, so watch for
this.
|
This is now nice and stirred down again. Still looks very fluffy.
Remember that not all batches will volcano! Let your pot sit on the counter
for about 5 minutes BEFORE you cook to make sure
that the soap will not volcano, and also to give
yourself a chance to stir again (better saponification)
in case volcano does not occur.
Step 12: Cook time! Pop little
pot in the big pot which is 1/2 filled with
gently boiling water (you should have had this
prepared already before step 1)
|
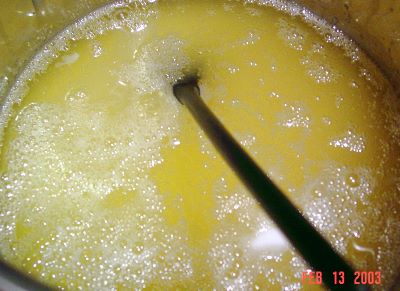
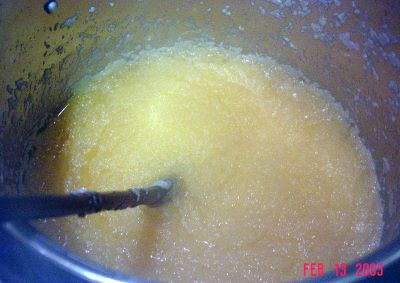
In a few minutes in the big pot, this is what it will look like: Separation.
The oil and water appear to separate, with the white stuff swimming in
the oil.
At this point, feel free to cover the small pot and walk away for a bit.
I go post notes on the forums for 15 minutes to 1/2 an hour or so. The
soap's not going anywhere.
**Note: STIR STIR STIR.
|
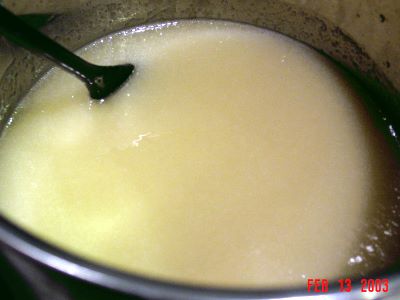
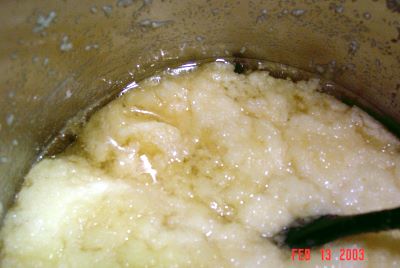
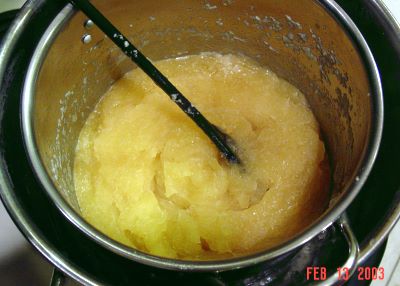
This is what it looks like pre-gel... starting to get translucent,
the 'oil' has mostly vanished by itself.
Sometimes, it will not look like this, it may
look like a VERY thick mass of vanilla pudding,
and it will start turning translucent from the
outside edges inward towards the center. Keep
stirring this, it's not gel, it's just saponification.
Once the translucency reaches the center, you
are actually still at separation. You can tell
the difference when you reach gell, the CONSISTENCY
of the soap actually changes to well, gel. It
is not liquidy.

|
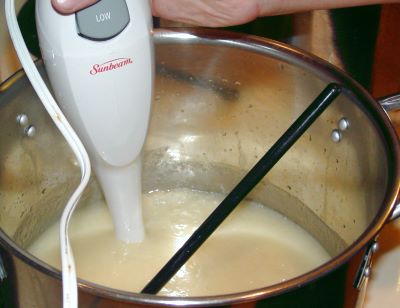
When you stir this up a bit, it looks more and more translucent. Keep
cooking.
The cook process takes from 10 minutes to 1
hour depending on the oils in your recipe if
you are watching your time. This also depends
on the size of your batch!
**Note: STIR STIR STIR. This is the #1 reason people have trouble with
HP. It's not a souffle you can't touch. Walk away, take a break, etc,
but if you go look at it, Stir it again. I don't mean drag spoon across
the top, I mean every time you stir, flip all the soap over and mix it
thoroughly.
|
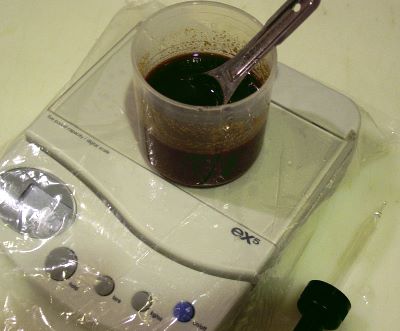
This is usually when I weigh and mix up the additives I'm going to
put in. Color, scent, superfat oils, milk, honey,
oatmeal, whatever you're using in your recipe.
|
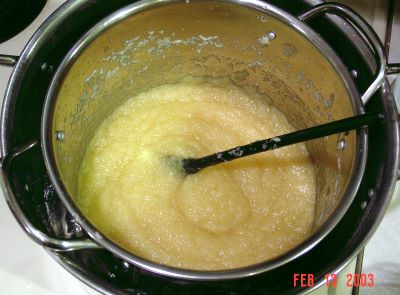
After I mix everything... when I check the pot, I see... SOAP! It looks
like the top and the sides of the pot have formed a waxy substance (that's
soap drying), the middle kind of translucent.
The water is cooked out... the longer you wait, the more dry it will
be.
**Note: STIR STIR STIR. This is the #1 reason people have trouble with
HP. It's not a souffle you can't touch. Walk away, take a break, etc,
but if you go look at it, Stir it again. I don't mean drag spoon across
the top, I mean every time you stir, flip all the soap over and mix it
thoroughly.
|
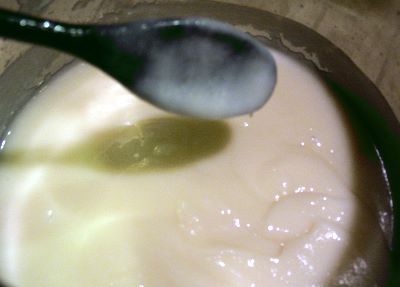
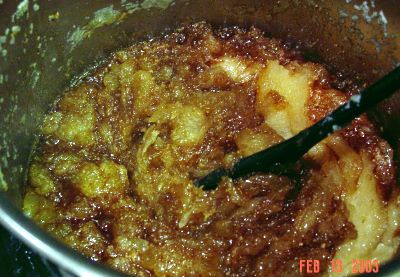
As soon as you stir this though... GEL. As you can see, it's STUCK
together like a blob. You cannot mistake this
for a liquid. If you can imagine stirring vaseline,
this is what it would look like. Depending on
your oils, it will vary from very thick to slightly
thinner, but it will still have that vaseline
'stuck together' consistency.
**Note: STIR STIR STIR.
|
Step 13: Now is when you add your adds and stir them
in. You have the option of stirring til it's
all smooth, or leaving it kind of 'swirled'.
In HP, swirling is kind of easy because you're
doing it in a near solid rather than a liquid.
I know I know, this may not have been the best batch to photograph, the
color is intentionally this way. You'd have to actually see and smell
the finished soap to understand why I did this to the pristine snow white
jelly:P.
|
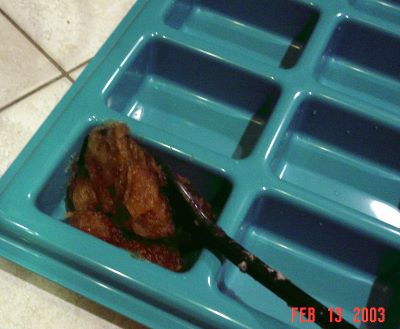
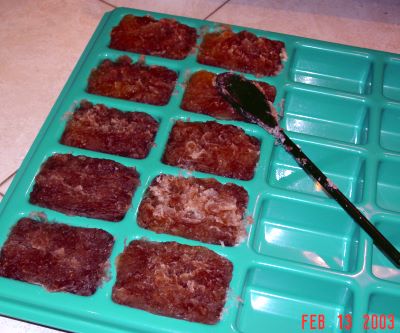
Step 14: Time to glop it into the mold!
If you haven't done it already, lightly spray
the mold with PAM or any non stick spray. This
is important, otherwise the soap will not come
out easily at all!
Spoon, smash, smack the tray, smush it into your mold however you can
get it in there tightly.
|
I use the spoon to smash it in more on the top. Then I drop the mold
on the counter or the ground a few times (make sure your floor is clean
enough to eat off of, no one wants yucky stuff in their soap:P).
|
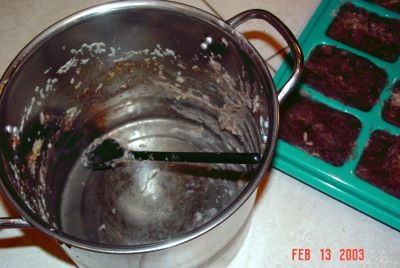
This pot and 1 spoon and my oil measuring cup is all I have to wash:).
The entire process took about 1/2 an hour from
the time I broke out my first pot for a 4 lb
batch.
|
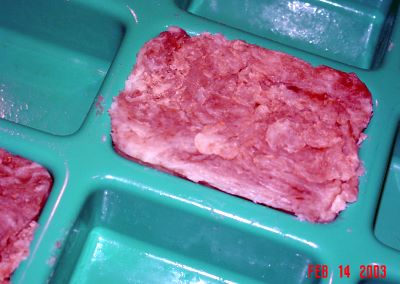
Here is the dry soap at the 3 hour mark in mold, it's still toasty
warm, but coming out because it's already hard:
|
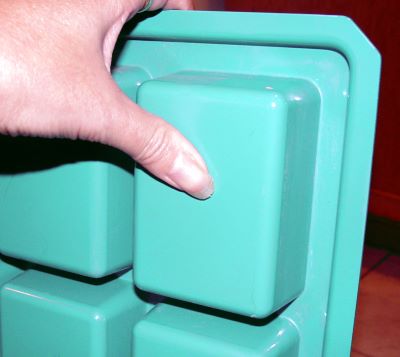
I lightly rub and squeeze on the back of each mold to release my soap.
|
Cutting and trimming the soap. My mold is sized so that I cut each
mold bar in 1/2 to get a 4.4 oz bar of finished soap. I bevel only 1 side.
Since I like the lumpy texture, it stays.
|
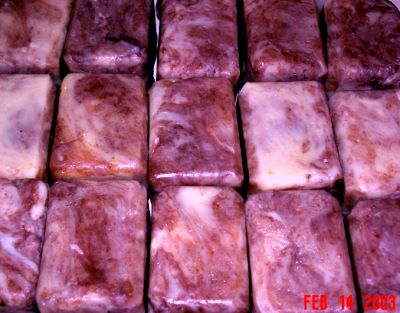
This is the backside of the finished soaps for those who don't like
to look at lumpy textures:). The picture isn't
that great, the actual soap looks like a waxy
piece of marble.
Remember that the size of your batch, the oils
you use and the additions you put in will change
your cooking time, texture and the entire look
of your soap!
The above guide gives you what the look of
each step is, but your batch may skip a few
steps, it may take much longer to cook, your
gel may be more thick or very thin.
There is much art behind making soap, and even
though this guide makes it seem easy, there's
usually quite a bit of skill involved in recognizing
the different stages for your own formula, and
your finished soap has much to do with the recipe
you use, the climate and altitude you make your
soap in, and other variables that no book or
guide can give you. For that reason, I do not
include a recipe. There is no recipe that can
be perfect for your area and your needs. That
can only be achieved through much practice and
time spent making soap. This guide will save
you much time, but it will not replace experience.
Good luck!
|
That's it:)! You can run to the shower with your warm soap:)! It WILL
last longer if you let it cure/dry for a week or so, but from the moment
it's cooked, it's fully saponified soap!
Hope you enjoyed my guide, if you have any
questions or comments, feel free to sign up on my Soapmaking forum to ask your questions: www.SoapersAsylum.com
**Visit my new soap photo gallery (warning:
VERY long load time because there is minimal
compression on the images for best viewing)
Click
Here
**Note about my mold. So many people have
asked me about this mold that I'm going to post
the details. You can buy them from Shapemasters,
an industrial plastic manufacturer at this link:
Shapemasters
They sell these for as low as $8.50, but that's in quantity of hundreds.
They agreed to sell them individually for $19.00 for just one, so when
you inquire, tell em, Helen at Zensoaps said you'd sell me ONE for $19.00.
I'd like them to know I referred you because I'm trying to get them to
invest in some 'standard' soaping sized molds as well, and the more soapers
interested, the more likely this will occur. So please do tell them where
you got the referal from!
These molds are just awsome for HP because you can make 2 bars for a
test batch, or the full tray (giving you 50 bars if you cut them in half)
of 10 lbs with only 1 mold. Release is easy too, just rub and push on
the back and the soap pops out (these molds are harder to release with cold processed soaps. Please remember to GREASE THE MOLD before filling them, this is important). I have just about every kind of mold made,
and these are my favorite for convenience. Plop the soap in, push em out
the back 3 hours later:).
They ARE a bit on the large side, so I do all my releasing on the floor.
Am discussing with them cutting them in half for soapers so it's more
convenient to use on a countertop also.
I hope you enjoy the visuals for how to make soap, a tradition that goes back nearly 5000 years:).
Helen Starkweather
|
©Copyright
ZenSoaps. All Rights Reserved. 2002-2009 |